How to measure and photograph for hoof boots
How to measure for your Hoof Boots!
It is of utmost importance to take accurate measurements and choose a hoof boot that is the right size and shape for your horses’ hoof. You wouldn’t go running in a pair of trainers that don’t fit properly, so don’t expect your horse to either!
The best time to measure is straight after a fresh trim, before shoes are put on if your horse is currently still shod. Measuring the naked hoof is best! To ensure the measurements are as accurate as possible, you should use millimetres and not inches. You will also need to use a hard ruler or tape measure, not a soft tape measure. A retractable tape measure is often best, as you can hook it over the edge of the hoof.
Width
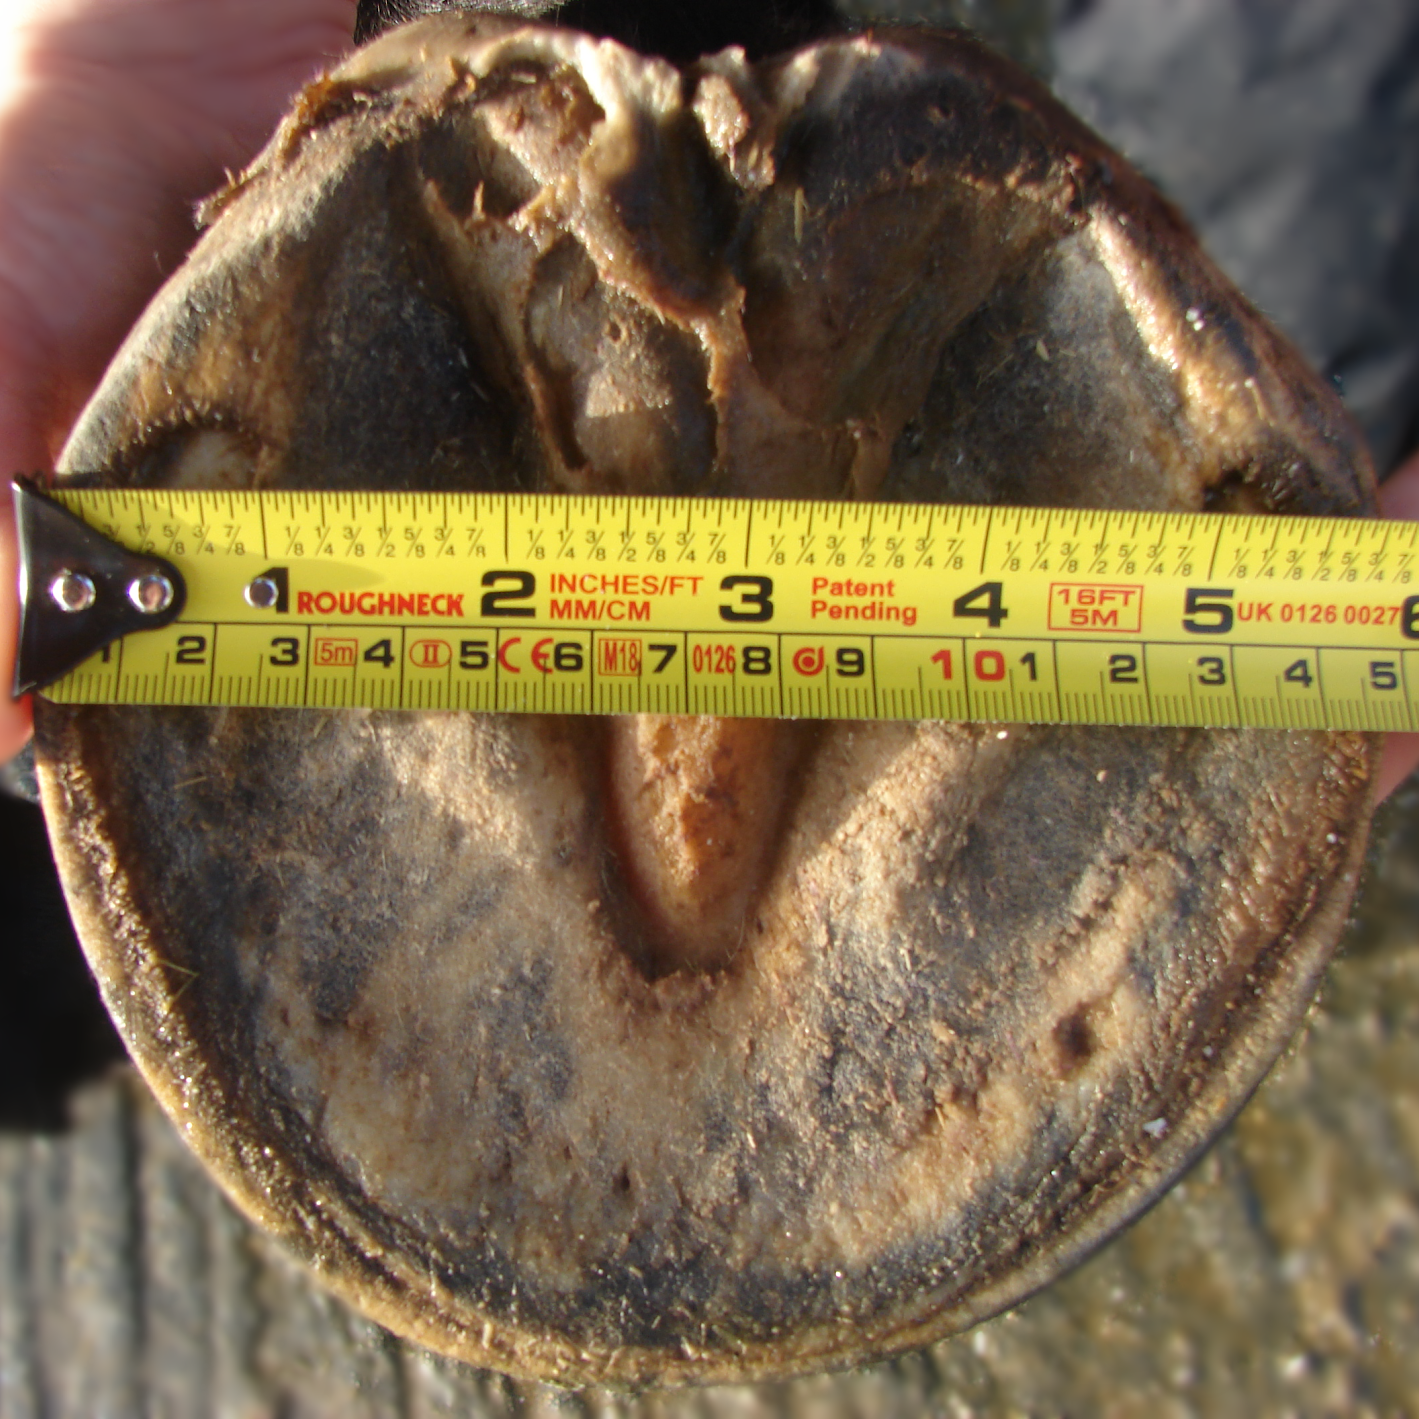
First, measure the width of the hoof at the widest point (Photo 1). This is not always in the same place, as it depends on the shape of the hoof (normally approximately ½ way or slightly over ½ way towards the heel from the toe).
Make sure your ruler or tape measure is held straight across the hoof, and not slightly on the diagonal, as this will affect your measurement. (The tape measure in these photos is in inches, but we have chosen them as they are such clear photos.)
Length
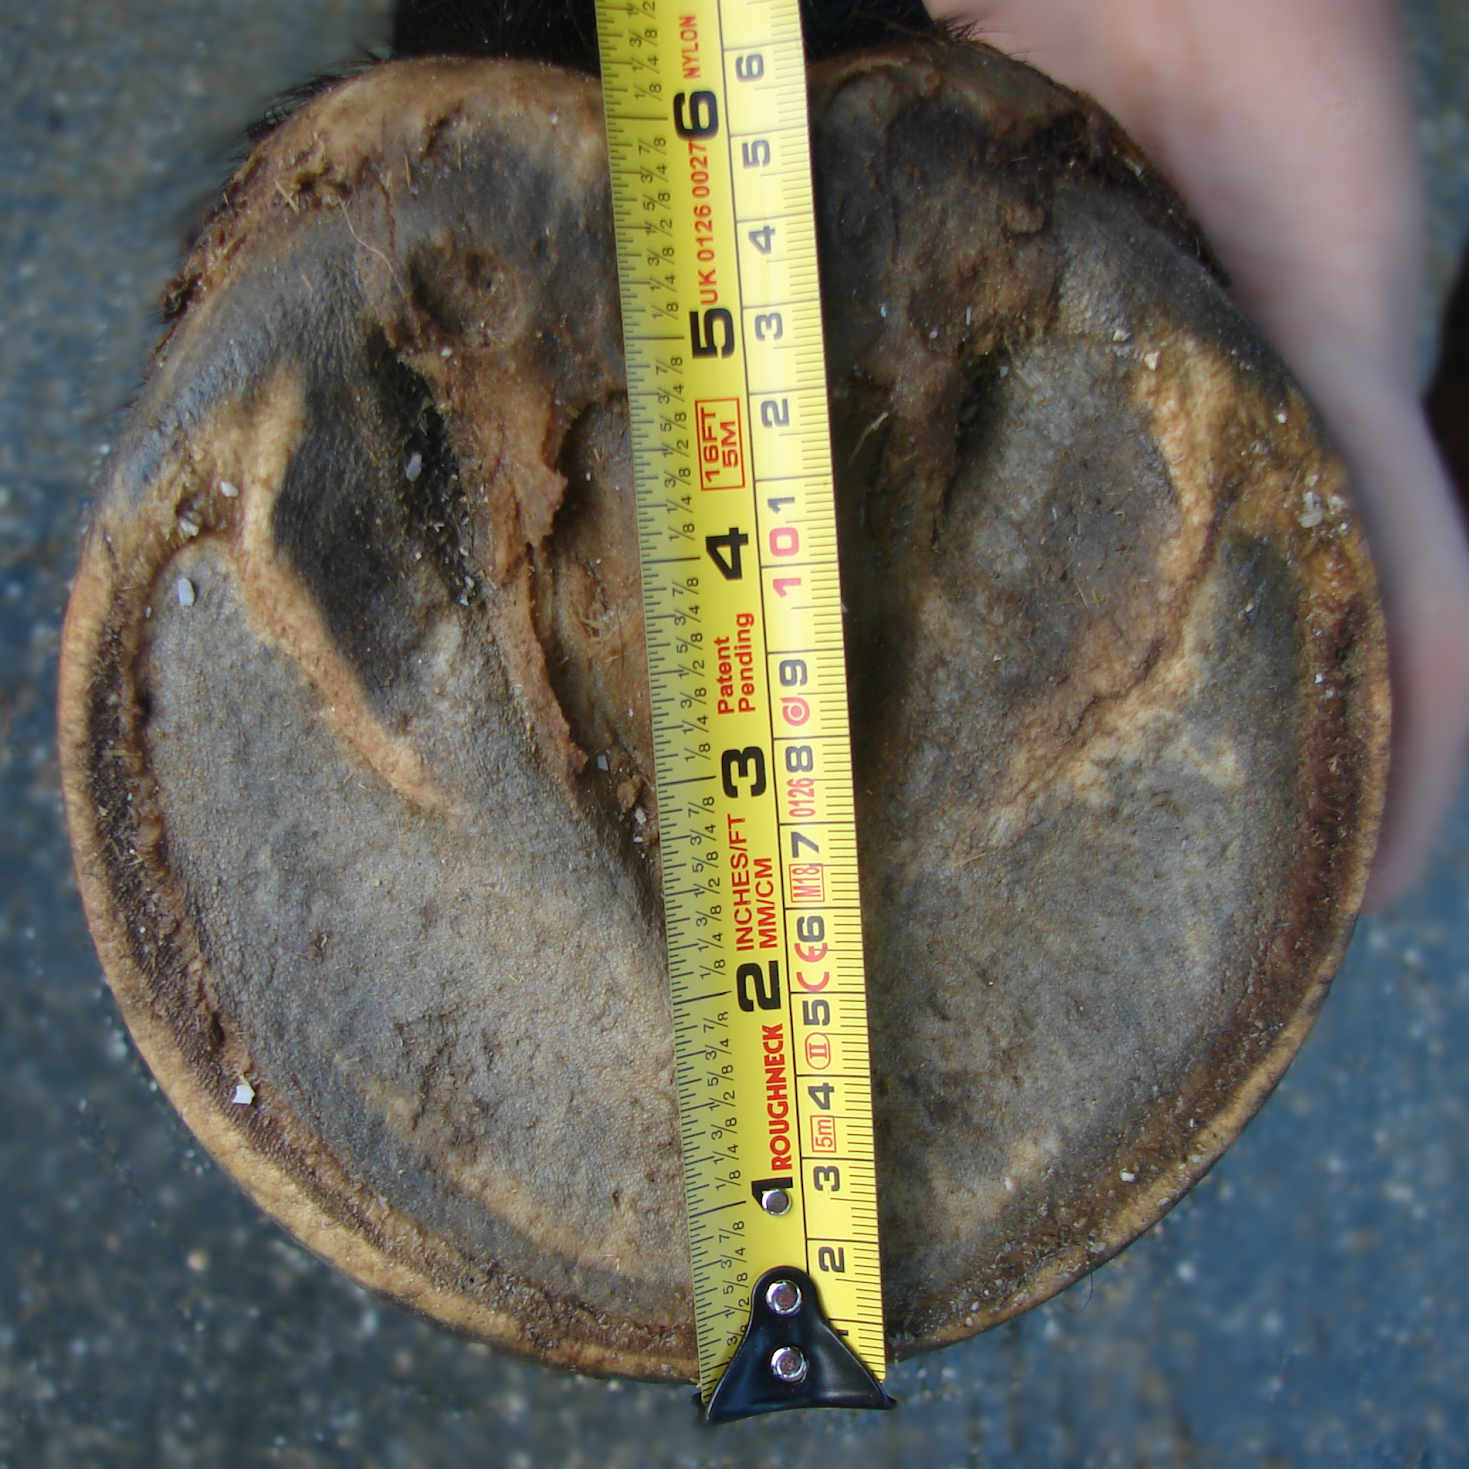
Secondly, measure the length of the hoof (Photo 2). This is not quite as straight-forward as measuring the width, as you have to determine the rearmost point of weight-bearing at the heels. This is roughly where the hoof wall ends and doesn’t include the heel bulbs. Some horses will bear weight quite far back on their frog, so you will need to include this in the length measurement. For some horses, with particularly large frogs or heels, you may need to allow a little extra to length to accommodate the heel bulbs in some styles of boots.
It can be helpful to hold a straight edge across the back of the bottom edge of the heel buttresses and then measure from the toe, bisecting the frog to the line you have formed. This only works for a healthy hoof, and may not be accurate for a horse with long heels.
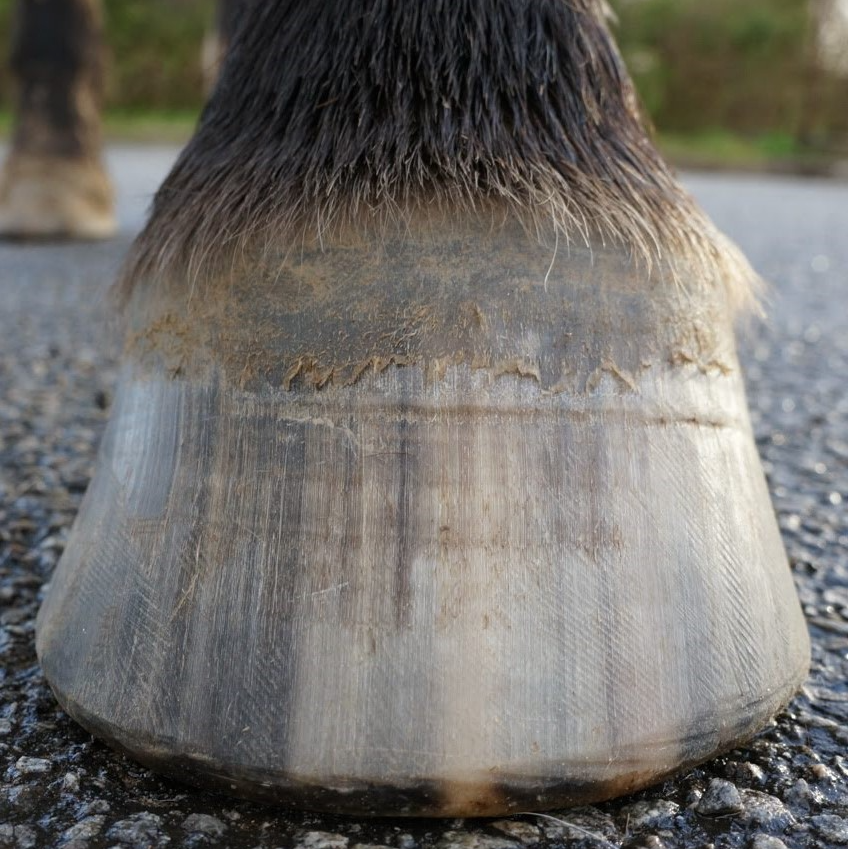
If the horse has very upright or under run heels, you will need to envisage where the heel should be if the hoof was healthy (like the hoof Photo 3), and take your measurements to that point, and not the actual point of the buttress, to allow for the extra length of hoof behind the buttress line. If you are finding it hard to do this, try placing the hoof on the floor and visualising it that way - look at it side on, and get right down to ground level to see the weight bearing area, and visualise where the heels should be (if they were properly underneath the horse). Then try measuring again and it should be a little easier to judge.
Need help? Send us photos!
If you are taking photos of the hooves, to show us, then ideally we need to see 5 photos for each hoof. As well as measurement photos, views of the hooves on the ground can be really helpful to give us an idea of the hoof shape. Ideally take the photos on a clean level surface with good natural light. Please make sure the hooves are clean and that any heavy feathers are tied up or bandaged up out of the way. These photos can be really handy when we are helping find the best hoof boots to suit your horse's hooves. We will often refer back to these after seeing hooves in a Fit Kit. We also love getting a photo of the whole horse (so we can put a face to the feet) if you have one you would like to send us!
We have a few ways you can send photos through to us...
• Email us! Send photos to sales@hoofbootique.co.uk. Please send the photos as attachments and don't resize them (else we can't read them!). You can send as many emails as you need and usually 2-3 photos per email sends easily.
• Use a file sharing app such as WeTransfer - a safe and free file sharing site. If using this, send the sharing linkto sales@hoofbootique.co.uk.
• Whatsapp us on our business number, which is: 07396 716671.
• Send us a message through Facebook Messenger, our Facebook Group can be found HERE.
When getting in touch with photos, please try to only contact us by one of these methods to avoid delays.

Photo 1 (Width) - Measure horizontally across the widest part of the hoof, try not to measure diagonally. Hold camera directly above the hoof.

Photo 2 (Length) - Measure from the tip of the toe and let the tape measure run all the way to the back of the heel bulbs, and don't try to use anything to create a straight edge across the buttress. We need to have a clear view of the heels to more accurately judge where to measure for length. Hold camera directly above the hoof.

Photo 3 - (Front view) Please hold the camera low to the ground so we can get a good angle view of the side walls

Photo 4 (Side view) - Please hold the camera low to the ground (mouse eye level is perfect!). A side view can help show angle and heel height. It is important to include the heel bulbs so we can really see the bulb size and heel height.

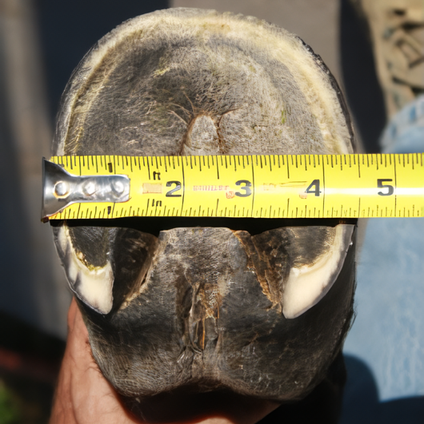
Photo 5 & 6 (Heel bulb view) - Please hold the camera low to the ground and/or take this angle with the hoof held up off the ground if that is easier. A view of the heel bulbs gives an idea of the heel bulb height and shape.

Using your measurements
You will then need to find the hoof boot best suited to your horse. You can either compare your measurements to our size charts (each hoof boot has it’s own size chart, and a particular size in one boot will not necessarily have the same measurements as the same size in another style of boot), or you can look at our guide to choosing a hoof boot first, to narrow down your choices. Please feel free to contact us and we will be happy to help with the boot sizing and choice.
At this stage it could be a good idea to try Fit Kit in the hoof boot that suits plus a size smaller and a size bigger.
• Please click HERE to see our size charts.
• Please click HERE to see our Fit Kits.
• Please click HERE to see our guide to choosing a hoof boot
Trim cycle
Please note that all hoof boots are designed to allow for some growth in between trims, but this will be based on a proper, regular trim at around 4-6 weekly intervals. If you measure your horse in between trims, and/or if your horse is trimmed less regularly, then you need to allow a little leeway and be prepared that the hoof boots you choose may not fit as you approach a trim (due to the extra growth), or straight after a trim. You may want to use a tool such as a Riders Rasp to safely control flare, round or roll the edge of the hoof wall (mustang roll) in between professional trims. This should also help to maintain a good fit for your hoof boots. Sometimes it will be necessary to have 2 different sizes of hoof boot, so you have a size larger to use as you approach a trim.
Here are two useful blogs by Flex boot where they explain how to take great hoof photos and how to choose the right boots...
https://www.flexhoofboots.com/post/how-to-take-hoof-photos
https://flexhoofboots.com/choose-the-right-size/


