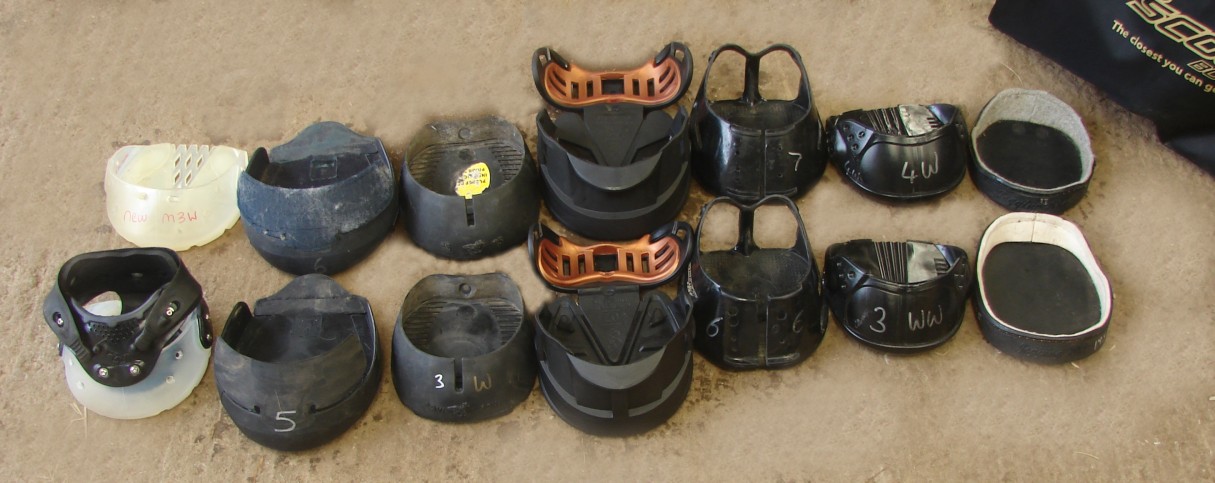
Thank you for hiring your Fit Kit from Hoof Bootique. This guide is designed to help you use your Fit Kit effectively, so you know how to use it and what to look for when trying your Fit Kit shells on. We will include some general tips that apply to all brands of Fit Kit shells, and then also some more detailed guidance for each specific brand of boots (please read the general advice first to get the best out of your Fit Kit). If you would like us to be involved in the sizing process, we are always happy to look at photos and videos of your Fit Kit shells on, and we have included some examples of the photos that are helpful for us to see.
We highly encourage you to send us photos/and or videos of your Fit Kit on, so we can help advise on how they fit before you purchase boots. You can email the photos to sales@hoofbootique.co.uk or contact us via Facebook Messenger. We ideally need to see photos of the hooves in each fitting shell on the ground from the front/side and heel bulb views (camera as low to the ground as possible for photo, mouse eye view). Videos can also be helpful to demonstrate how tightly fitting a particular shell is.
When returning your Fit Kit, please clean the shells of any mud/debris before returning them to us.
We will retain a cleaning fee of £5-10 from your Fit Kit deposit if a Fit Kit is returned to us dirty (e.g. super muddy!)
Brands with specific advice:
Scoot Boots, Renegade - Viper and Classic models, Evo Boots, Floating Boots, Swiss Galoppers, Cavallo, Equine Fusion, Flex Boots, Easycare - Easyboot Glove/Back Country, Easycare - Easyboot Fury.
GENERAL ADVICE FOR USING OUR FIT KITS - PLEASE READ THIS FIRST, BEFORE READING THE BRAND SPECIFIC ADVICE
Fit Kit shells vary hugely from brand to brand, so there are some specific things that you need to look for with each brand, but there are also some general rules that you can apply.
- Ideally try your Fit Kit shells on just after a trim. If you are approaching a trim, it is probably a good idea to hold onto your Fit Kit for a little longer and try it immediately before and then after the trim. Please contact us first, if you will need to keep the kit for longer than the usual 14 day period.
- Give yourself plenty of time and plan to try on your kit more than once. It is often helpful to have one long trying-on session, but then to go back and try the shells on again, on another day, to re-evaluate the fit (especially if we are involved in the sizing process, as we may ask questions about how some of the shells fit etc).
- Don’t rush to send your Fit Kit back to us - just in case we ask you to try something on again, or take some more photos.
- Try the shells on at a standstill, on clean, dry hooves. Ideally on a flat, hard surface and in good light. Don't walk or trot up your horse in the shells - they aren't designed to stay on, without all the straps and parts.
- Organise the shells, so you know which sizes/boots you need to try on which hoof. If you have a large kit and are fitting shells on all four hooves, or on more than one horse, it can seem a bit overwhelming when you first start trying shells on if you haven’t planned it a little.
- Have a camera ready to take photos. Better still, have an assistant with a camera, ready to take the pics for you! It can also help to have another pair of eyes, to judge the fit.
- Once you are ready to start trying the shells on, make sure you are getting the toe of the hoof all the way into the toe of the boot. It can help to pull the horse's knee into your body/lap so you have two hands free to put the boot shell on. When you put the hoof down, carefully lower the hoof to the ground making sure you keep the shell straight. If you can’t get the horse’s toe all the way into the boot, or if you can’t get the shells on straight, it is probably a sign that they are too small. Some boots are best when tapped on at the toe with a rubber mallet but most don't need to be that tight - we will mention it in the brand specific advice if they are a boot that can be fitted tightly.
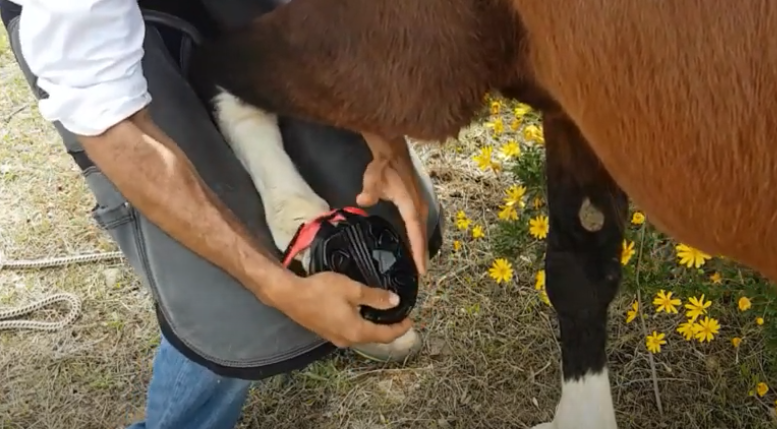
- Note how tight the shells are to put on, and take off. This will vary between brands and will be more important for more closely fitted shells.
- The fit around the heels is just as important as the fit at the front of the hoof.
- Do the “twist test” with each boot shell. With the shell on, lift the hoof into a picking out position and try to twist the shell by hand. Ideally you want very little movement. A Fit Kit shell on it’s own (without all of the boot fixings) may twist a little more than the actual boot. If the centre of the frog was 12 on a clockface, then movement of between 11-1 is generally acceptable with a Fit Kit shell. (Once the final boots are on and done up with all their straps, then there should be no twist, or minimal twist (no more than 5 degrees each way).

The "Twist Test" - a universal test for fitting hoof boots. Do this with all Fit Kit shells, and all complete hoof boots to check the fit.
Taking photos of the Fit Kit shells (to send to Hoof Bootique)
- We need to see photos of each hoof in each shell from as many angles as possible. In particular the front, side and heel bulb views.



- Make sure the photos clearly show which hoof is which, and which boot size is which. Label them if necessary. We have written the boot sizes onto most Fit Kit shells with a metallic Sharpie, but there may be the odd shell that isn’t labelled so please don’t assume that we will know which size it is! There are various ways of labelling the photos - writing on the hooves, editing the photo to add a comment, a handwritten note on the ground next to the hooves to show which hoof is which, a particular object (such as a tail in the photo!) or colour coding.


- Don’t take the photos too close up (or too far away) - it can help us judge the fit better if we can see the whole hoof and shell in the photo.
- Videos can be a great way of showing how tight a shell is to put on/off and also to demonstrate the “twist test”. A combination of still photos and videos is generally best. If doing a video, please try to edit out any unnecessary bits.
- If your horse has feathers, it can be helpful to bandage or tie them up out of the way, so we can clearly see the hooves and shells. (Please try to have the bandage above the coronet though (unlike the green one in the photo) so we can see the whole hoof).

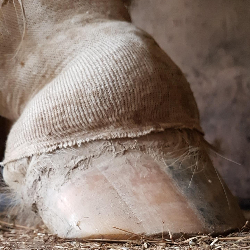
- Send the photos as large files, so we can zoom in and clearly see the fit. There are various ways of sending photos to us - email attachments, file sharing services such as Drop Box or We Transfer, Send Us A Message via our Facebook page. We can accept photos via What's App or Text Message - please contact us by email first to arrange.
- In order for us to assess how the shells fit, and better judge the most suitable hoof boot, we need to also have some clear hoof and measurement photos. Please ensure you also send us (or have already sent us) the photos set out in this guide. Thank you!
Helpful photo angles
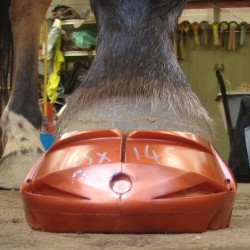
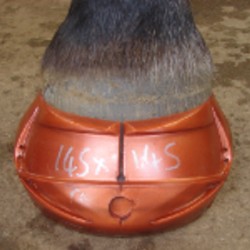
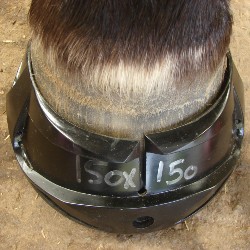
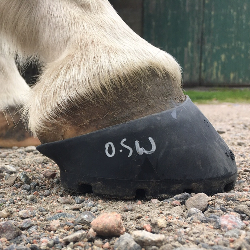
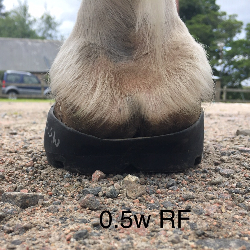
- For most Fit Kit shells, a photo showing the fit from the front, side and heel bulb views are the most important. For the front view, you want to be looking down on the boot a little, so we can see how the boot sits around the hoof wall. For the side view and heel bulb views though, the camera needs to be almost on the ground (mouse eye level!).
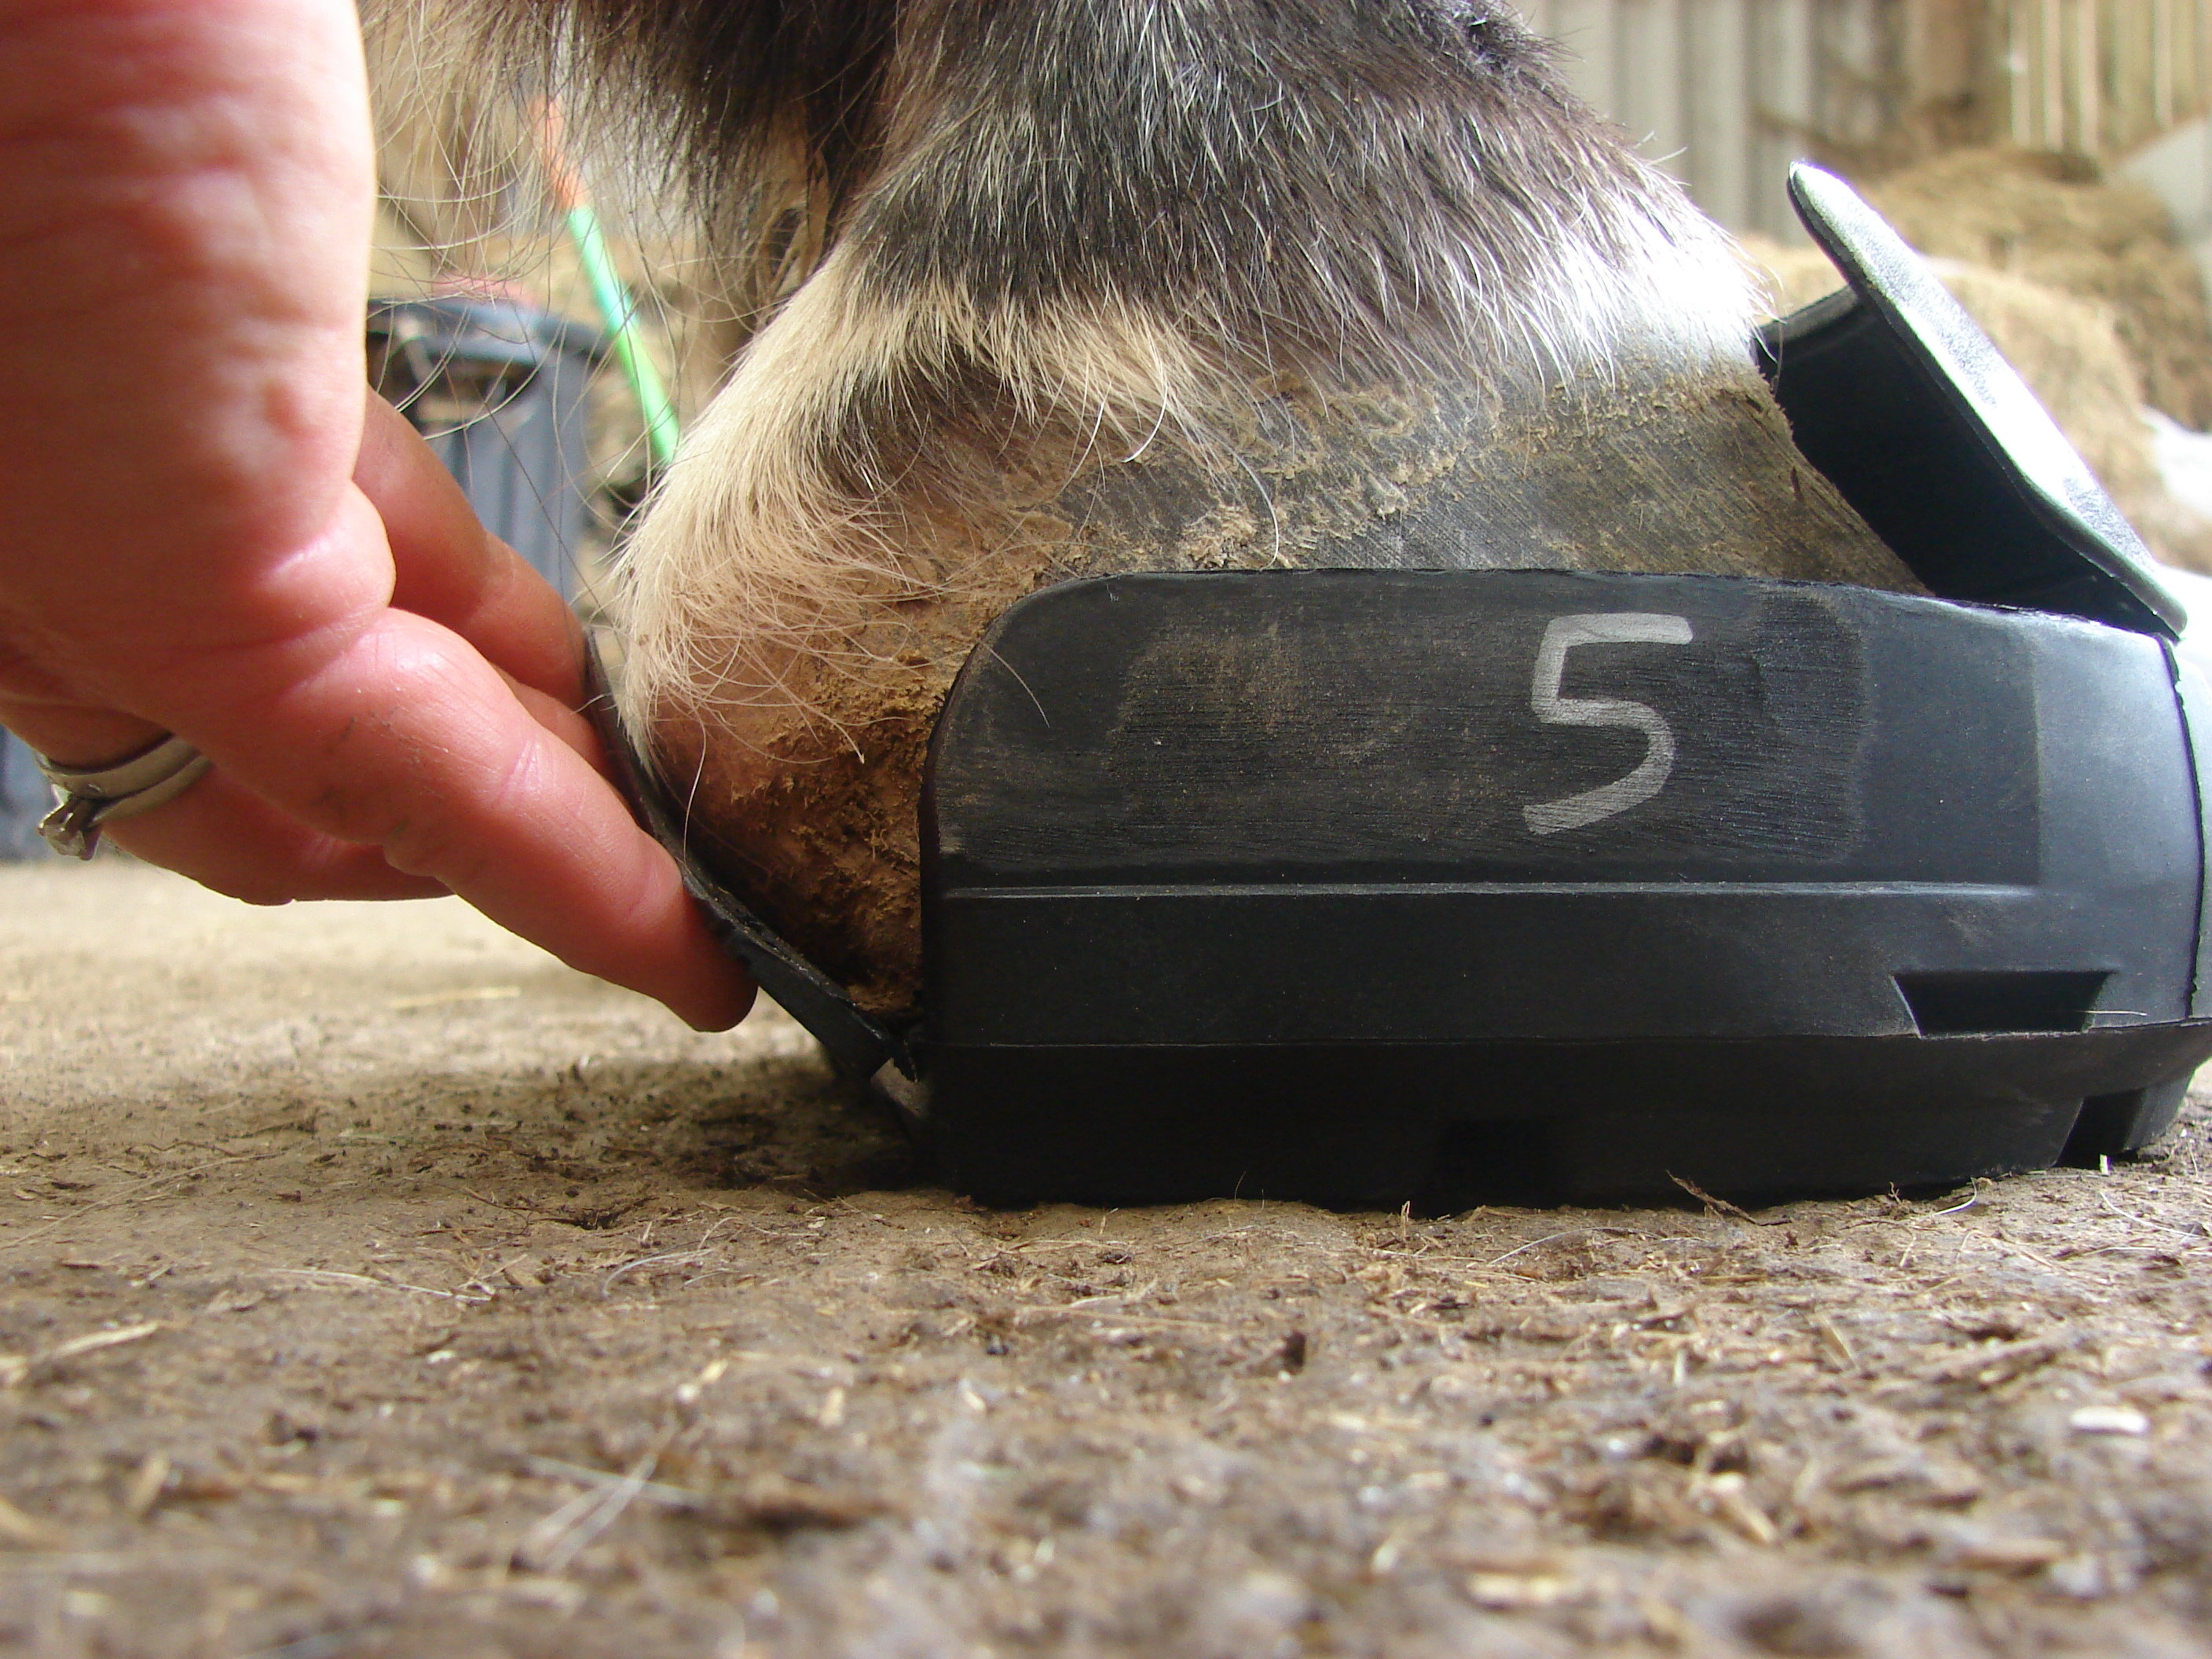
If the camera is too low to the ground for the front view photo (like the 1st photo below), it makes it hard to see how the boot is fitting around the hoof wall - it is better to have the camera a little higher (2nd photo) and then also higher again, looking down on the shell, so we can see how it fits around the hoof wall (3rd photo).
Side view - 1st pic below - this is a great photo as we can clearly see how the shell fits around the heel bulbs to check the shell length. Best taken at mouse eye level! Side view - 2nd pic below - useful angle as we can see how the shell fits around the hoof wall but we also need to see a photo like the 1st side view pic in order to check the length. Heel bulb view - 3rd pic below - useful angle, so we can see how the shell fits either side of the heel bulbs.

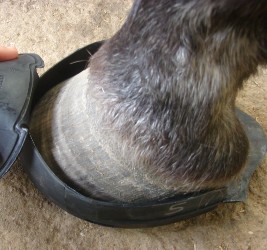
- If trying on Cavallo and Equine Fusion shells - photos looking down into the boot from above are helpful, to show how much room there is around the hoof.

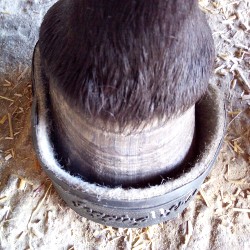
- Cavallo and Swiss Galopper shells both have a loose, moveable heel part - if you push this heel part up against the bulbs, it is easier for us to judge how the actual boots will fit around the horse’s heel bulbs.
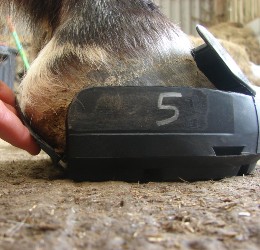
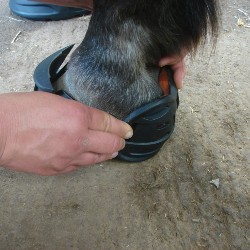
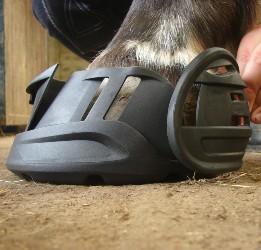
- If trying on Renegades, Evo Boots or Floating Boots, a photo with the shell on but with the hoof up off the ground, showing the sole/length, is helpful. Make sure the boot is held on at the toe, so it doesn't slip.

- Scoot Boots - show if you can fit a finger under the heel arches, over each heel bulb.

- For Easyboot Glove, Floating Boots, Evo and Easyboot Fury - these boots need to fit quite precisely (almost a suction fit) so look for any air pockets and try to show these in your photos.

Specific Advice for Each Brand

To try on your Scoot Boot Fit Kit shells, pick up the hoof with the sole facing upwards in the trimming/picking out position and slip the toe of the hoof into the boot. Pull the rear of the boot over the bulbs (you may need to use a slight twisting motion), make sure it is centered, and place the hoof onto the ground.
- The hoof should slip comfortably into the boot, without having to use too much effort.
- The fit should be snug - not too tight or loose.
With the hoof on the ground:
- You should be able to fit a finger under each heel arch/heel strap of the boot and the heel bulb. If you cannot do this, the boot is too small. At no time should the strap be placing pressure on the bulbs.
- The heel bulbs should protrude through the gaps at the rear of the boot.
- If you push the front of the boot together (as though front straps have been secured) the gap at the front should ideally be between 10mm-15mm. (After riding in an actual boot, you will find that the boot will mould to the hoof and the gap will reduce in width. An ideal gap at the front of your Fit Kit shell is approx 10mm.)
- Ideally, the top of the boot (the part that sits around the hoof, below the coronary band) should fit snug against the hoof wall. There should be no gap between the boot and the upper hoof wall below the coronary band. Some gaps in a Fit Kit shell may close up once the front straps are fitted.
- If the base of the hoof doesn't fill the boot, the boots can still work well if they are a snug fit around the top of the hoof wall and around the heel bulbs.
Now pick up the hoof and do the “twist test” - gently try to twist the shell clockwise and anti clockwise (don’t force the boot). Your boot should not turn on the hoof - ideally you want the shell and hoof to move together. A little bit of movement side-to-side with your Fit Kit shell can still be fine (as you don’t yet have the front straps secured) but you don’t want more than a few degrees each way, and you don’t want the central vertical shank to pass over the bulbs.
https://www.youtube.com/watch?v=KARdZVvPodk&t=12s (How to use your Scoot Boot sizing shells/fit kit)
https://youtu.be/TFWyYnghgh0 (Fitting your Scoot Boots - four simple steps)
https://youtu.be/fsGck1tN880 (How to check your Scoot Boot fit - Fitting your Scoot Boots)
https://scootbootseurope.com/apps/help-center (lots of helpful photos and comments showing how the Scoot Boots should fit)
Renegades - Viper and Classic models

Renegade Viper model -
As the Heel Captivator is the main means of boot retention, not a tight-fitting boot shell, the shell alone may allow a little movement/twisting while on the hoof, but this is not a problem – you are checking that the shell isn’t too tight, that it is the right length and that it suits the hoof shape.
A Renegade Viper which fits the hoof perfectly would of course be preferred (this would be a neat fit all the way around the hoof wall and with no movement when trying to twist it), but somewhat loosely-fitting Vipers are just as likely to be successful in most situations. One downside to the boots fitting perfectly is they may get too tight as the hoof grows longer in between trimming cycles (you can get around this with more regular trimming, rasping yourself in between professional trims, or by having a larger pair of boots to use as you approach the end of the trim cycle). There is a fine line between a Viper that fits perfectly and a Viper that is too tight. If it is too tight, it will be very difficult to put on and take off, the V may be stretched very wide at the front and the shell may be distorted in places (where the hoof may be pushing it outwards). It may also look perched on the toe and not come back far enough on the hoof.
- If the boot shell does not fit easily onto the hoof, or if you cannot seat the toe into the boot with a tap from the palm of your hand, the boots are too tight. The shell should go on easily, or with a wiggle and a push and then sort of slot into place. It should come off with a bit of a wiggle and a pull.
- You also want to look for any bulging or gapping at the sides, as this can be a sign that the boot is too tight and that the hoof is pushing it out away from the hoof wall. The perfect fit would be a neat fit all the way around the hoof wall without any gaps but many horses wear Vipers that don't fit perfectly and they can still work really well. The odd slight gap can be fine, as long as overall the fit is good. Some gaps will close up once the straps are tightened around the hoof wall.
- The V at the front of the shell can be stretched open a little or closed - it doesn't really matter as long as it isn't forced open too wide.
- Getting the right sized shell is really important. Usually the standard sized parts will then suit the horse, but the Heel Captivator size and Cable size can be adjusted if necessary, to fine tune the fit. The shell can also be "cut-back" in length if necessary - if it is a good fit around the hoof wall but extends too far back and has excess boot length.
As hooves grow longer, they also get wider. If the shell fits very snugly, you should consider the trimming interval of your horse and how long they grow in between trims and decide whether or not you should go up one boot size to allow for said growth. Many boot users groom the hooves with a rasp each time before using boots (or even just weekly or fortnightly) which helps to maintain a good fit and promotes a healthy hoof.
If you have previously used Renegade Classic boots, then you will find the shape of the Viper shell is different. The heel area and the top third of the boot have both been pulled inwards, to create a closer fit and to prevent dirt and debris entering the boot. This means that given a proper boot size, the boot is a more snug fit than the Renegade Classic. Increased stability when sized properly is also a benefit of the new upper shape. The Viper shell may not suit all hoof shapes, and in some cases the Renegade Classic shape may be more suitable.
The Renegade Viper sizes come out a little smaller than suggested by the boot dimensions, so please refer to the size chart before sizing. If in doubt, it is generally better to size up.
Renegade Classic model -
The advice for using the Viper shells also applies to the Renegade Classic shells although the Classic will seem a slightly looser fit as they don't curve inwards so much towards the heels and the top of the hoof wall.
If the hoof has a very low angle, causing a gap between the hoof wall and the boot shell, it is possible to tuck the front flap of the shell inside the side walls (rather than having it sat outside the side walls as it usually is) which changes the angle of the boot.
https://www.renegadehorseboot.com/heel-captivator-positioning/ (useful to see how the whole boot works, can help when judging the length of the boot)
https://www.renegadehorseboot.com/hoof-conformation/ (Proper Hoof Confirmation for Renegade Hoof Boots)

To try on your Evo Boot Fit Kit, pick up the hoof with the sole facing upwards in the trimming/picking out position and slip the toe of the hoof into the boot (you may need to use a slight twisting motion to properly seat the toe into the toe of the boot). Make sure the shell is centered, and place the hoof onto the ground.
You want to check the shape, angle, length and width of each different size, on each hoof.
Some hooves will fit straight into an “out-of-the-box” Evo Boot, whereas other hooves will need more adjusting or even heat adaptation for the Evo Boots to fit well.
- The fit should be fairly tight - not extremely tight or loose. (A very tight fitting shell can work well, but the actual boots will be tighter to put on than the shell alone, so do bear this in mind.)
With the hoof on the ground:
- Is the toe of the hoof right into the toe of the boot?
- Ideally, you don’t want any air gaps between the boot shell and the hoof wall, in the front panel of the boot. Some gaps can be fixed with heat adaptation.
- When looking at the shell from the heel bulb view, there will always be a slight gap either side of the bulbs (between the hoof wall at the heels and the boot shell) as this is where the Bulb Shield part of the boot will be fitted. This is normal.
- Again, when viewing the shell from the heel bulb view, you ideally want the width of the boot base/tread to match almost exactly the width of the hoof inside. If the hoof is wider than the actual base/tread of the boot, then you will probably need to widen the boots with heat. If the base/tread of the boot is wider than the hoof, it is likely too wide and you will either need to select a narrower size or carry out an adjustment (the narrowing technique).
- To check the length, view the shell from the side. Excess length of around 3-5mm, beyond the rearmost point of weight bearing, is just right. Any less and the boots are likely too short. Any more, and the boots may need to be “cut-back” to trim off any excess length.
Now pick up the hoof and do the “wiggle test” - gently try to twist the shell clockwise and anti clockwise (don’t force the boot). Your boot should not turn on the hoof - ideally you want the shell and hoof to move together, as if the shell were glued on. A little bit of movement side-to-side with your Fit Kit shell can still be fine (as you don’t yet have the full boot on) but you don’t want more than a few degrees each way.
If you think you will need to adapt your final Evo Boots, please bear in mind it is easier to make a boot steeper, wider, bigger… than smaller!
To try on your Floating Boot Fit Kit, pick up the hoof with the sole facing upwards in the trimming/picking out position and slip the toe of the hoof into the boot (you may need to use a slight twisting motion to properly seat the toe into the toe of the boot). Make sure the shell is centered, and place the hoof onto the ground.
The fit should be fairly tight with no gaps around the hoof wall. (A very tight fitting shell can work well, but the actual boots will be tighter to put on than the shell alone and you may need to use a rubber mallet to tap the actual boot on at the toe, so do bear this in mind.)
The toe needs to be in contact with the front of the shell.
Ideally, you want the contour of the boot to fit the hoof - you don’t want any visible gaps or air gaps between the boot shell and the hoof wall, all the way around the shell. Some gaps can be fixed with heat adaptation.
Towards the heels, at the rearmost point of the shell on each side, a bit of a gap here is fine as it will allow for the fit of the gaiter. The gaiter will pull this part of the shell inwards and make it a tighter fit than the shell alone.
To check the length, view the shell from the side. The weight bearing length of the hoof and frog needs to sit inside the shell while the heel bulbs can protrude over the back of the shell.
Now pick up the hoof and do the “wiggle test” - gently try to twist the shell clockwise and anti clockwise (don’t force the boot). Your boot should not turn on the hoof - ideally you want the shell and hoof to move together, as if the shell were glued on. A little bit of movement side-to-side with your Fit Kit shell can still be fine (as you don’t yet have the full boot on) but you don’t want more than a few degrees each way.

To try on a Swiss Galopper Fit Kit, pick up the hoof with the sole facing upwards in the trimming position and slip the toe of the hoof into the boot. Keeping the toe right into the toe of the boot, lower the hoof onto the ground, ensuring the Fit Kit shell doesn't twist or slip. The hoof should sit comfortably into the boot and be a snug fit - not too tight or too loose. The weight bearing part of the hoof should sit within the Fit Kit shell.
The heel protector should sit at a right angle to the ground, if pushed up against the heel bulbs. If the main boot shell seems a good fit, but the heel protector is the wrong angle at the bulbs, then the L-version should offer a better fit.
https://youtu.be/W2iM-w3a2R0 (How to use your Swiss Galopper sizing shells/fit kit)

Start by placing the Fit Kit shell under the hoof. To do this, pick up the hoof with the sole facing upwards in the trimming/hoof picking position and slip the toe of the hoof into the boot. Make sure the horse’s toe is right into the toe of the Fit Kit shell and carefully lower it to the ground, trying to keep it straight and in position.
Because of the nature of this boot, the Fit Kit shell will not be a tight fit on the hoof and the horse will be able to walk out of it (even in the correct size). It is the upper part of the actual boot that will hold the boot securely in position, by the way it fits around the hoof wall, heels and pastern.
The correct size Fit Kit shell will have the inside wall of the boot sitting fairly neatly around the base of the hoof and the heel bulbs should generally protrude between 20mm-30mm past the back of the main part of the shell. The boots can still work well if they seem quite wide against the base of the hoof, as long as they will be a snug fit length ways, and as long as the hard plastic sides sit fairly closely against the sides of the heel bulbs.
The flap at the back of the shell can be held up against the heel bulbs, to see how the back of the boot will suit the heels. This back flap will form part of the heel area of the actual boot - this part of the boot is the same for all Cavallo boot models, and the flap is covered with a padded leather. New boots will be fairly upright at the heels but the heel area will really soften and mould to the shape of the heel bulbs with use. The more the heel bulbs protrude out of the shell here, beyond the back of the main part of the boot shell, the more slowly you will need to introduce the boots to allow them to break in.
If the heel flap sits at an angle of around 45 degrees to the ground, when pushed in against the heel bulbs, this suggests the boots will be a nice, snug fit around the heels. If the heel bulbs protrude more than this, pushing the heel flap closer to the ground, the boots could be too tight around the bulbs and could rub. If the heel flap can be pushed right up, to nearer a 90 degree angle to the ground, then the boots will be too loose around the heel area and could twist.
Cavallo photo 1: This boot should be a nice fit around the heel bulbs.
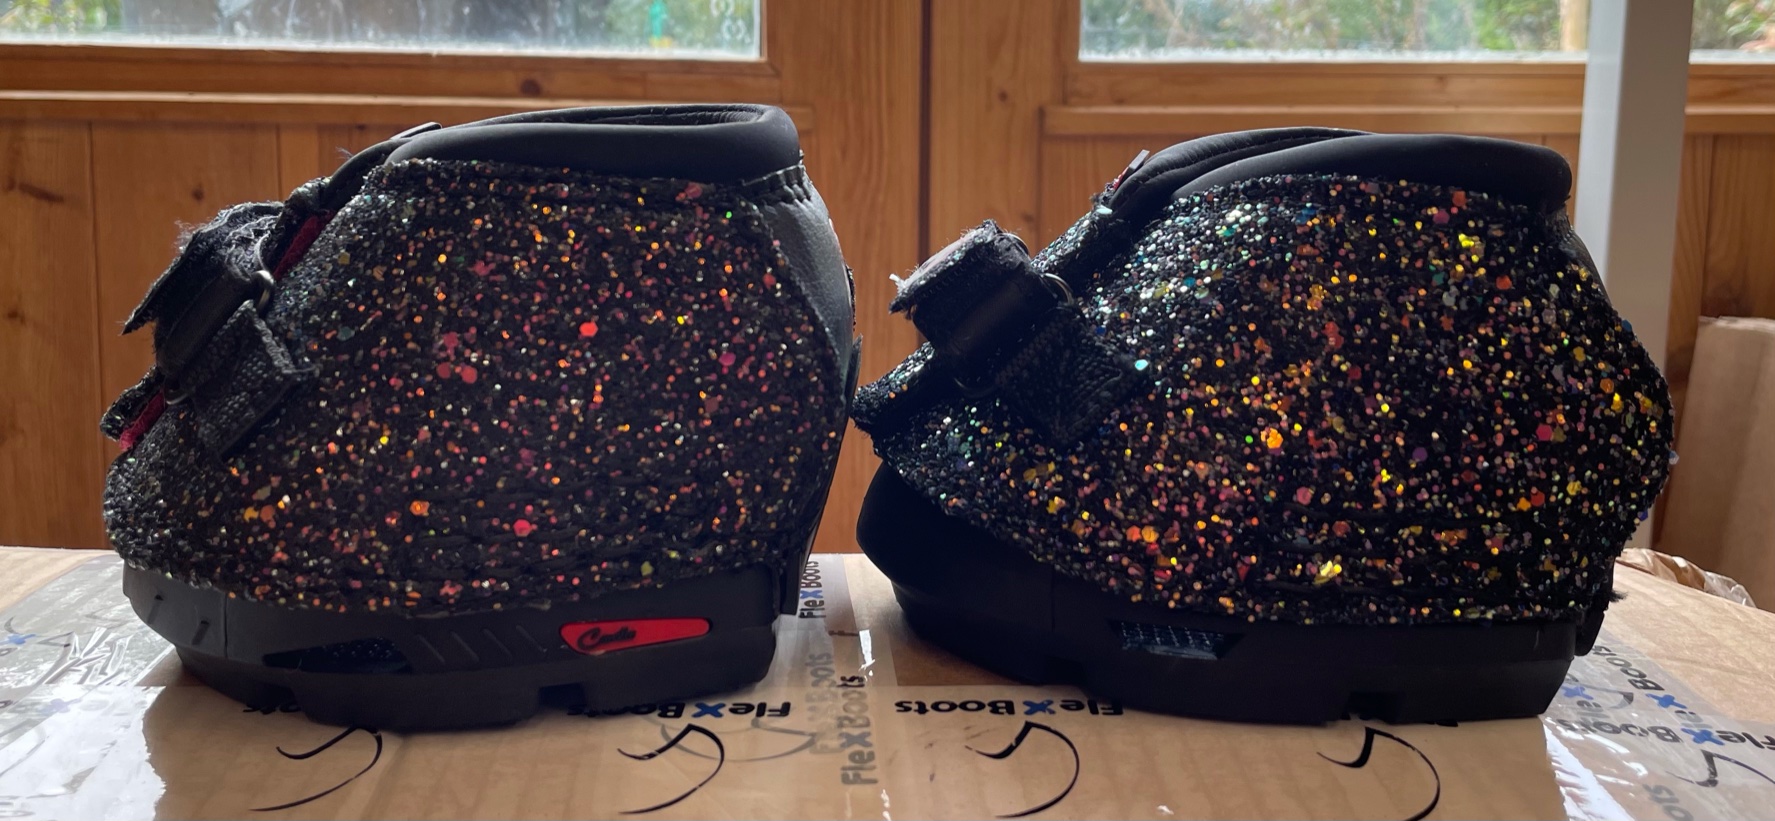
Cavallo photo 2: A new pair of Cavallo boots - look at the angle of the heel area, it is fairly upright when new.
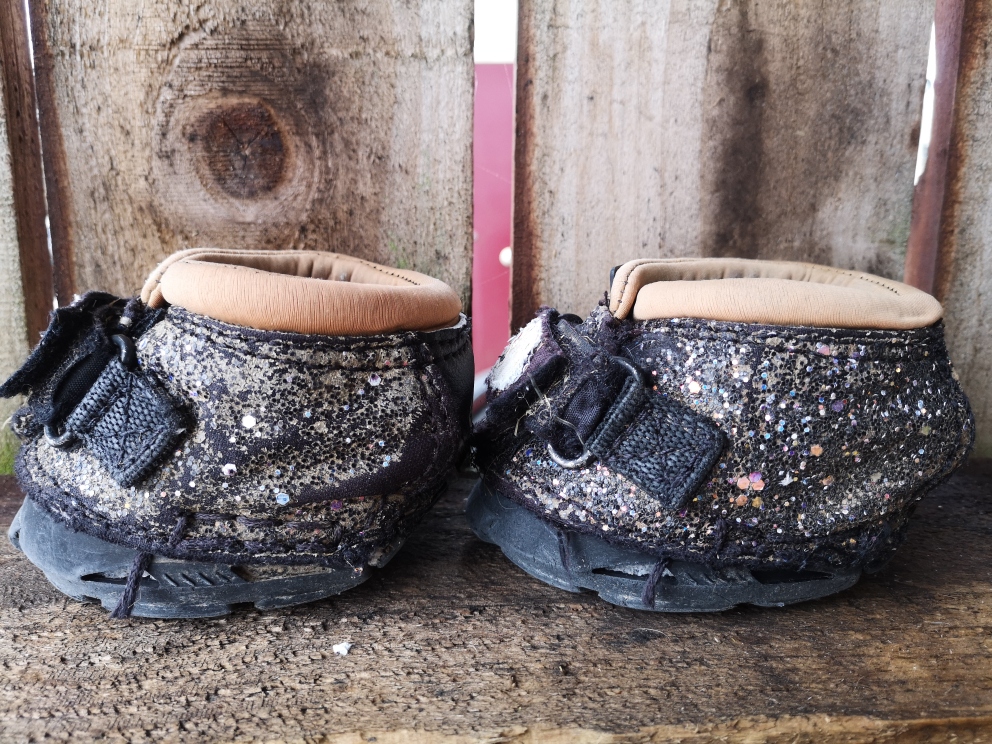
Cavallo photo 3: A well worn pair of the same boots shown in the previous photo. See how the heel area has softened and dropped, it has moulded around the heel bulbs.
A poor fit will have large gaps around the inside of the Fit Kit shell and if you can twist the shell 90 degrees or more on the hoof the shell is too big. Generally speaking, if the centre of the frog was 12 on a clockface, a twist of between 11 - 1 is fine with this style of boot.
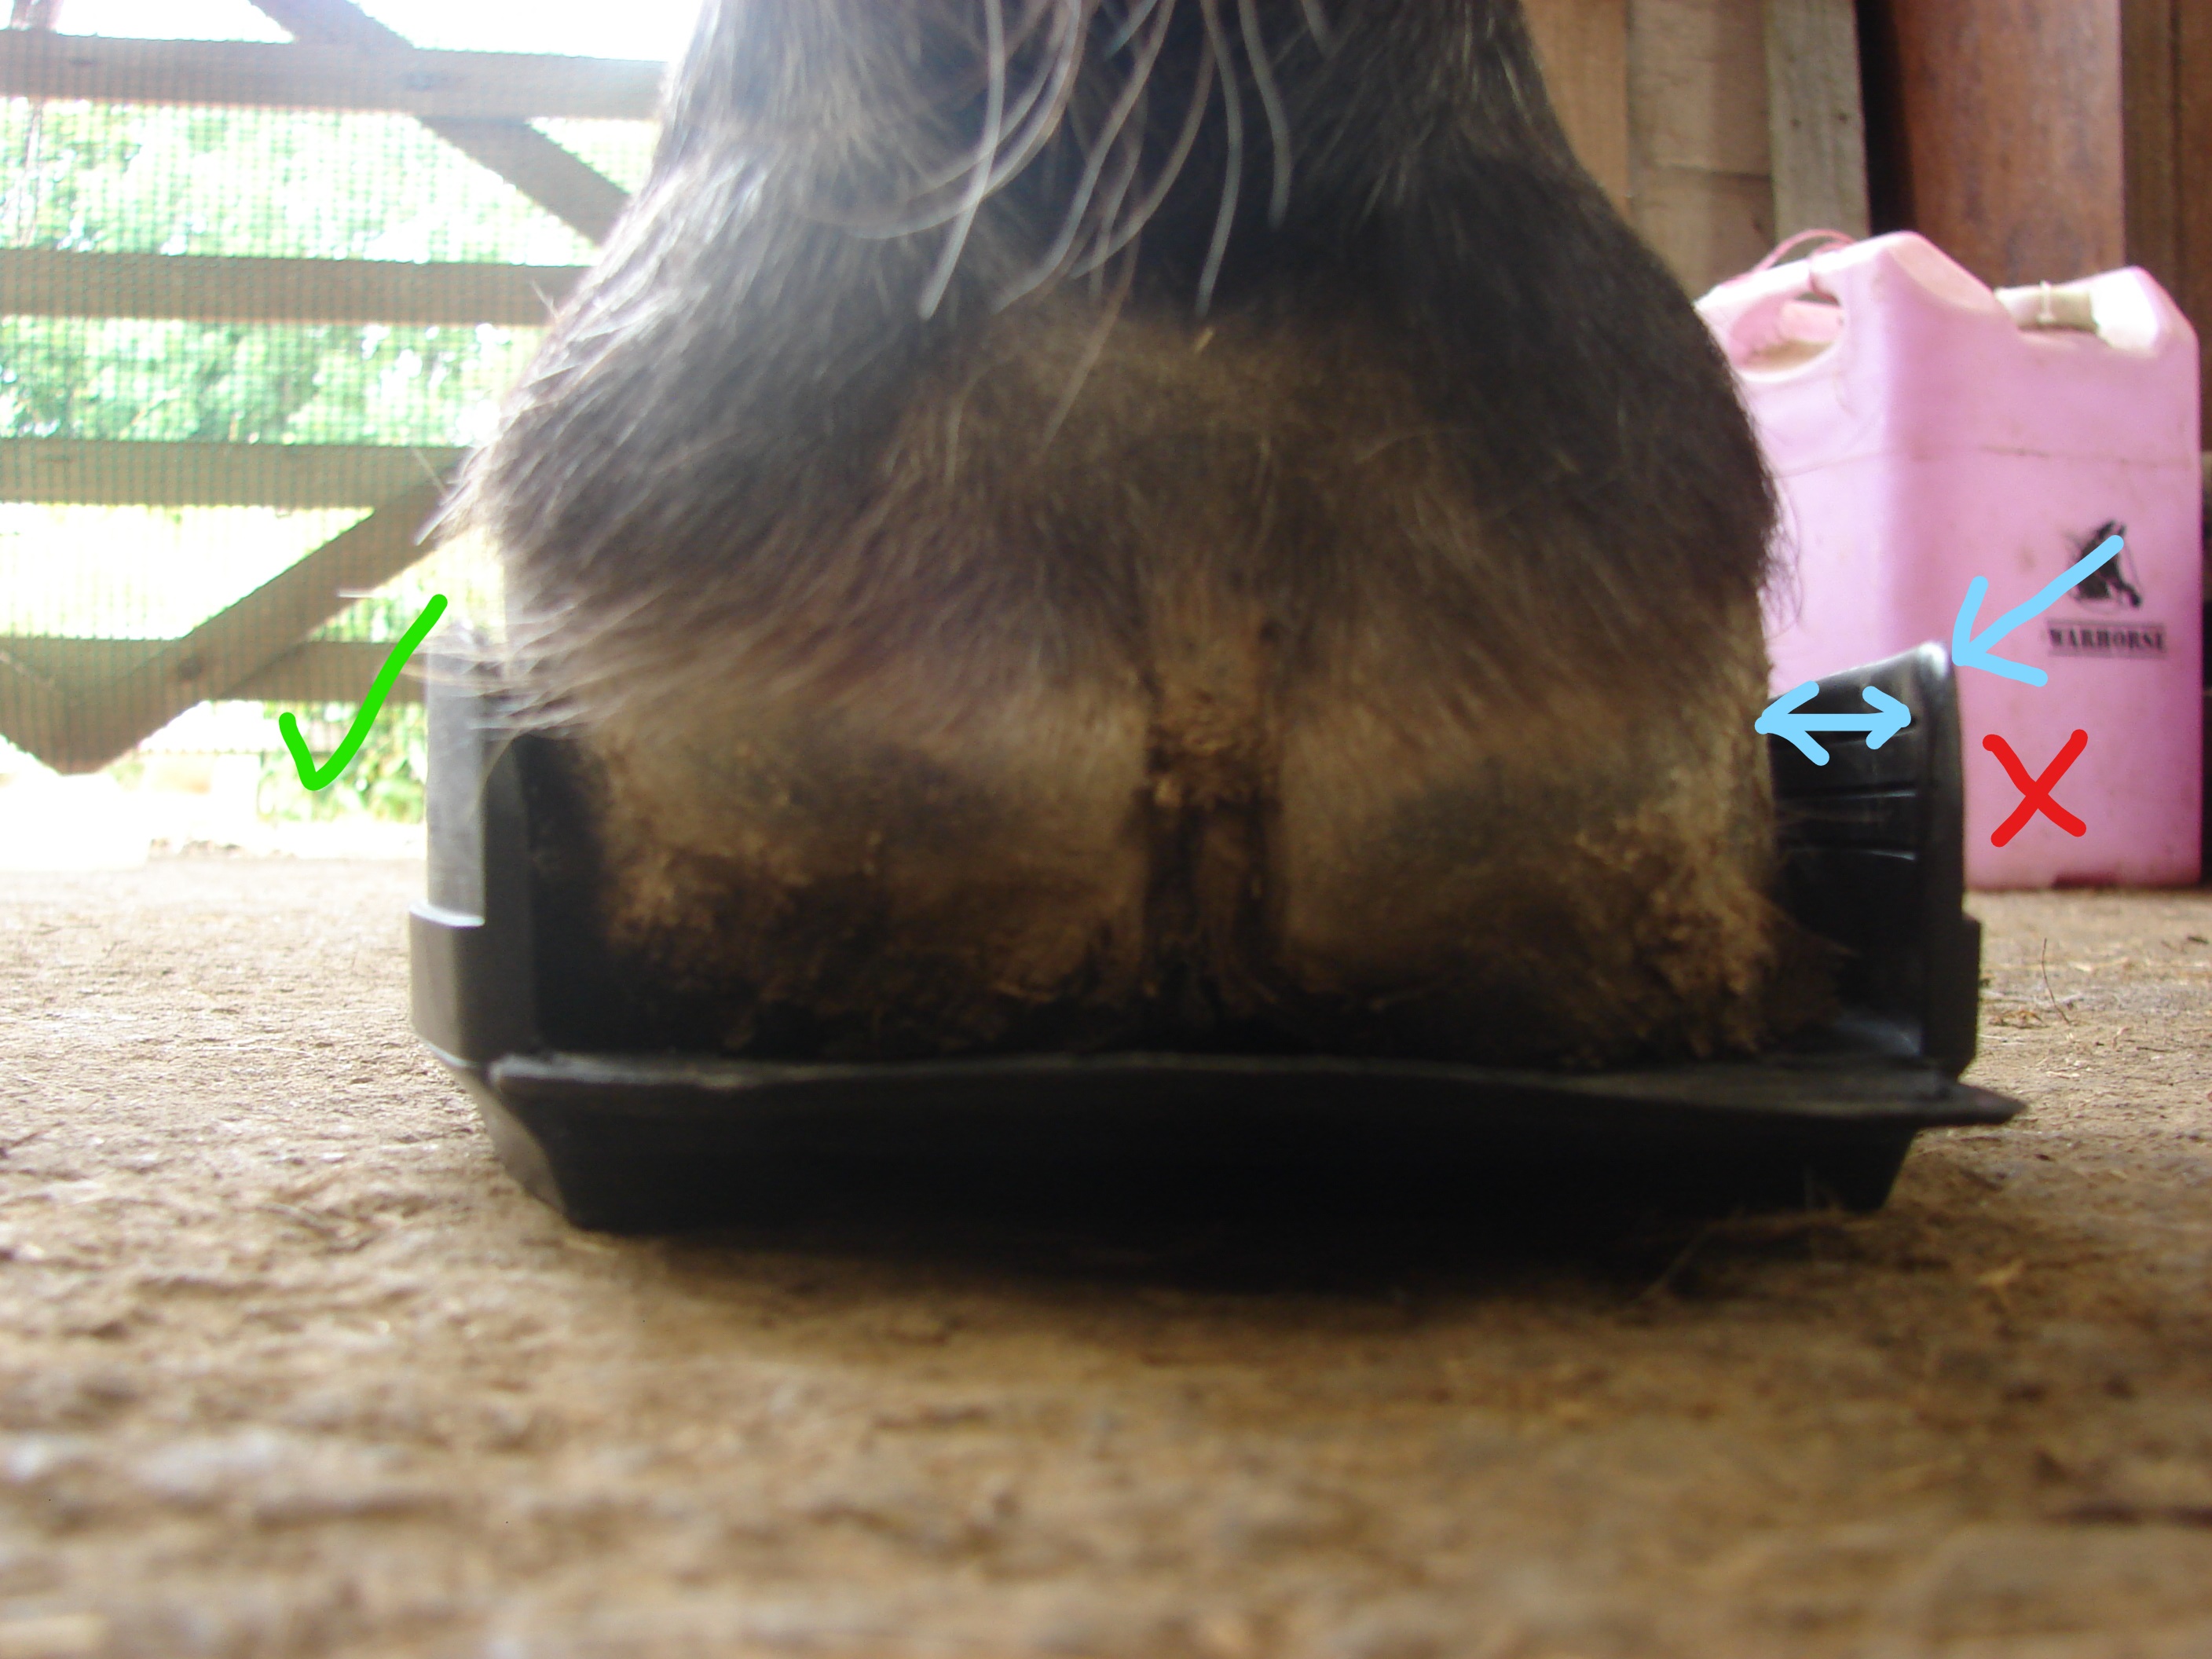
Cavallo photo 4: This boot is a bit wide, as the side wall on one side sits too far away from the hoof.
Another poor fit would have the hooves standing on the sides of the Fit Kit shell causing the shell to look distorted on the outside. The shell can be distorted a little and the boots still work well, as long as the hoof is sitting properly on the base of the shell. If the hooves are standing on the sides of the shell, and not properly sitting in the base, the shell is too narrow.

Cavallo photo 5: This photo shows a wide hoof that is distorting the side walls of a 2 Regular Cavallo fitting shell slightly, BUT the hoof IS sitting properly in the base of the boot. This size will work well, as it is just the right length.
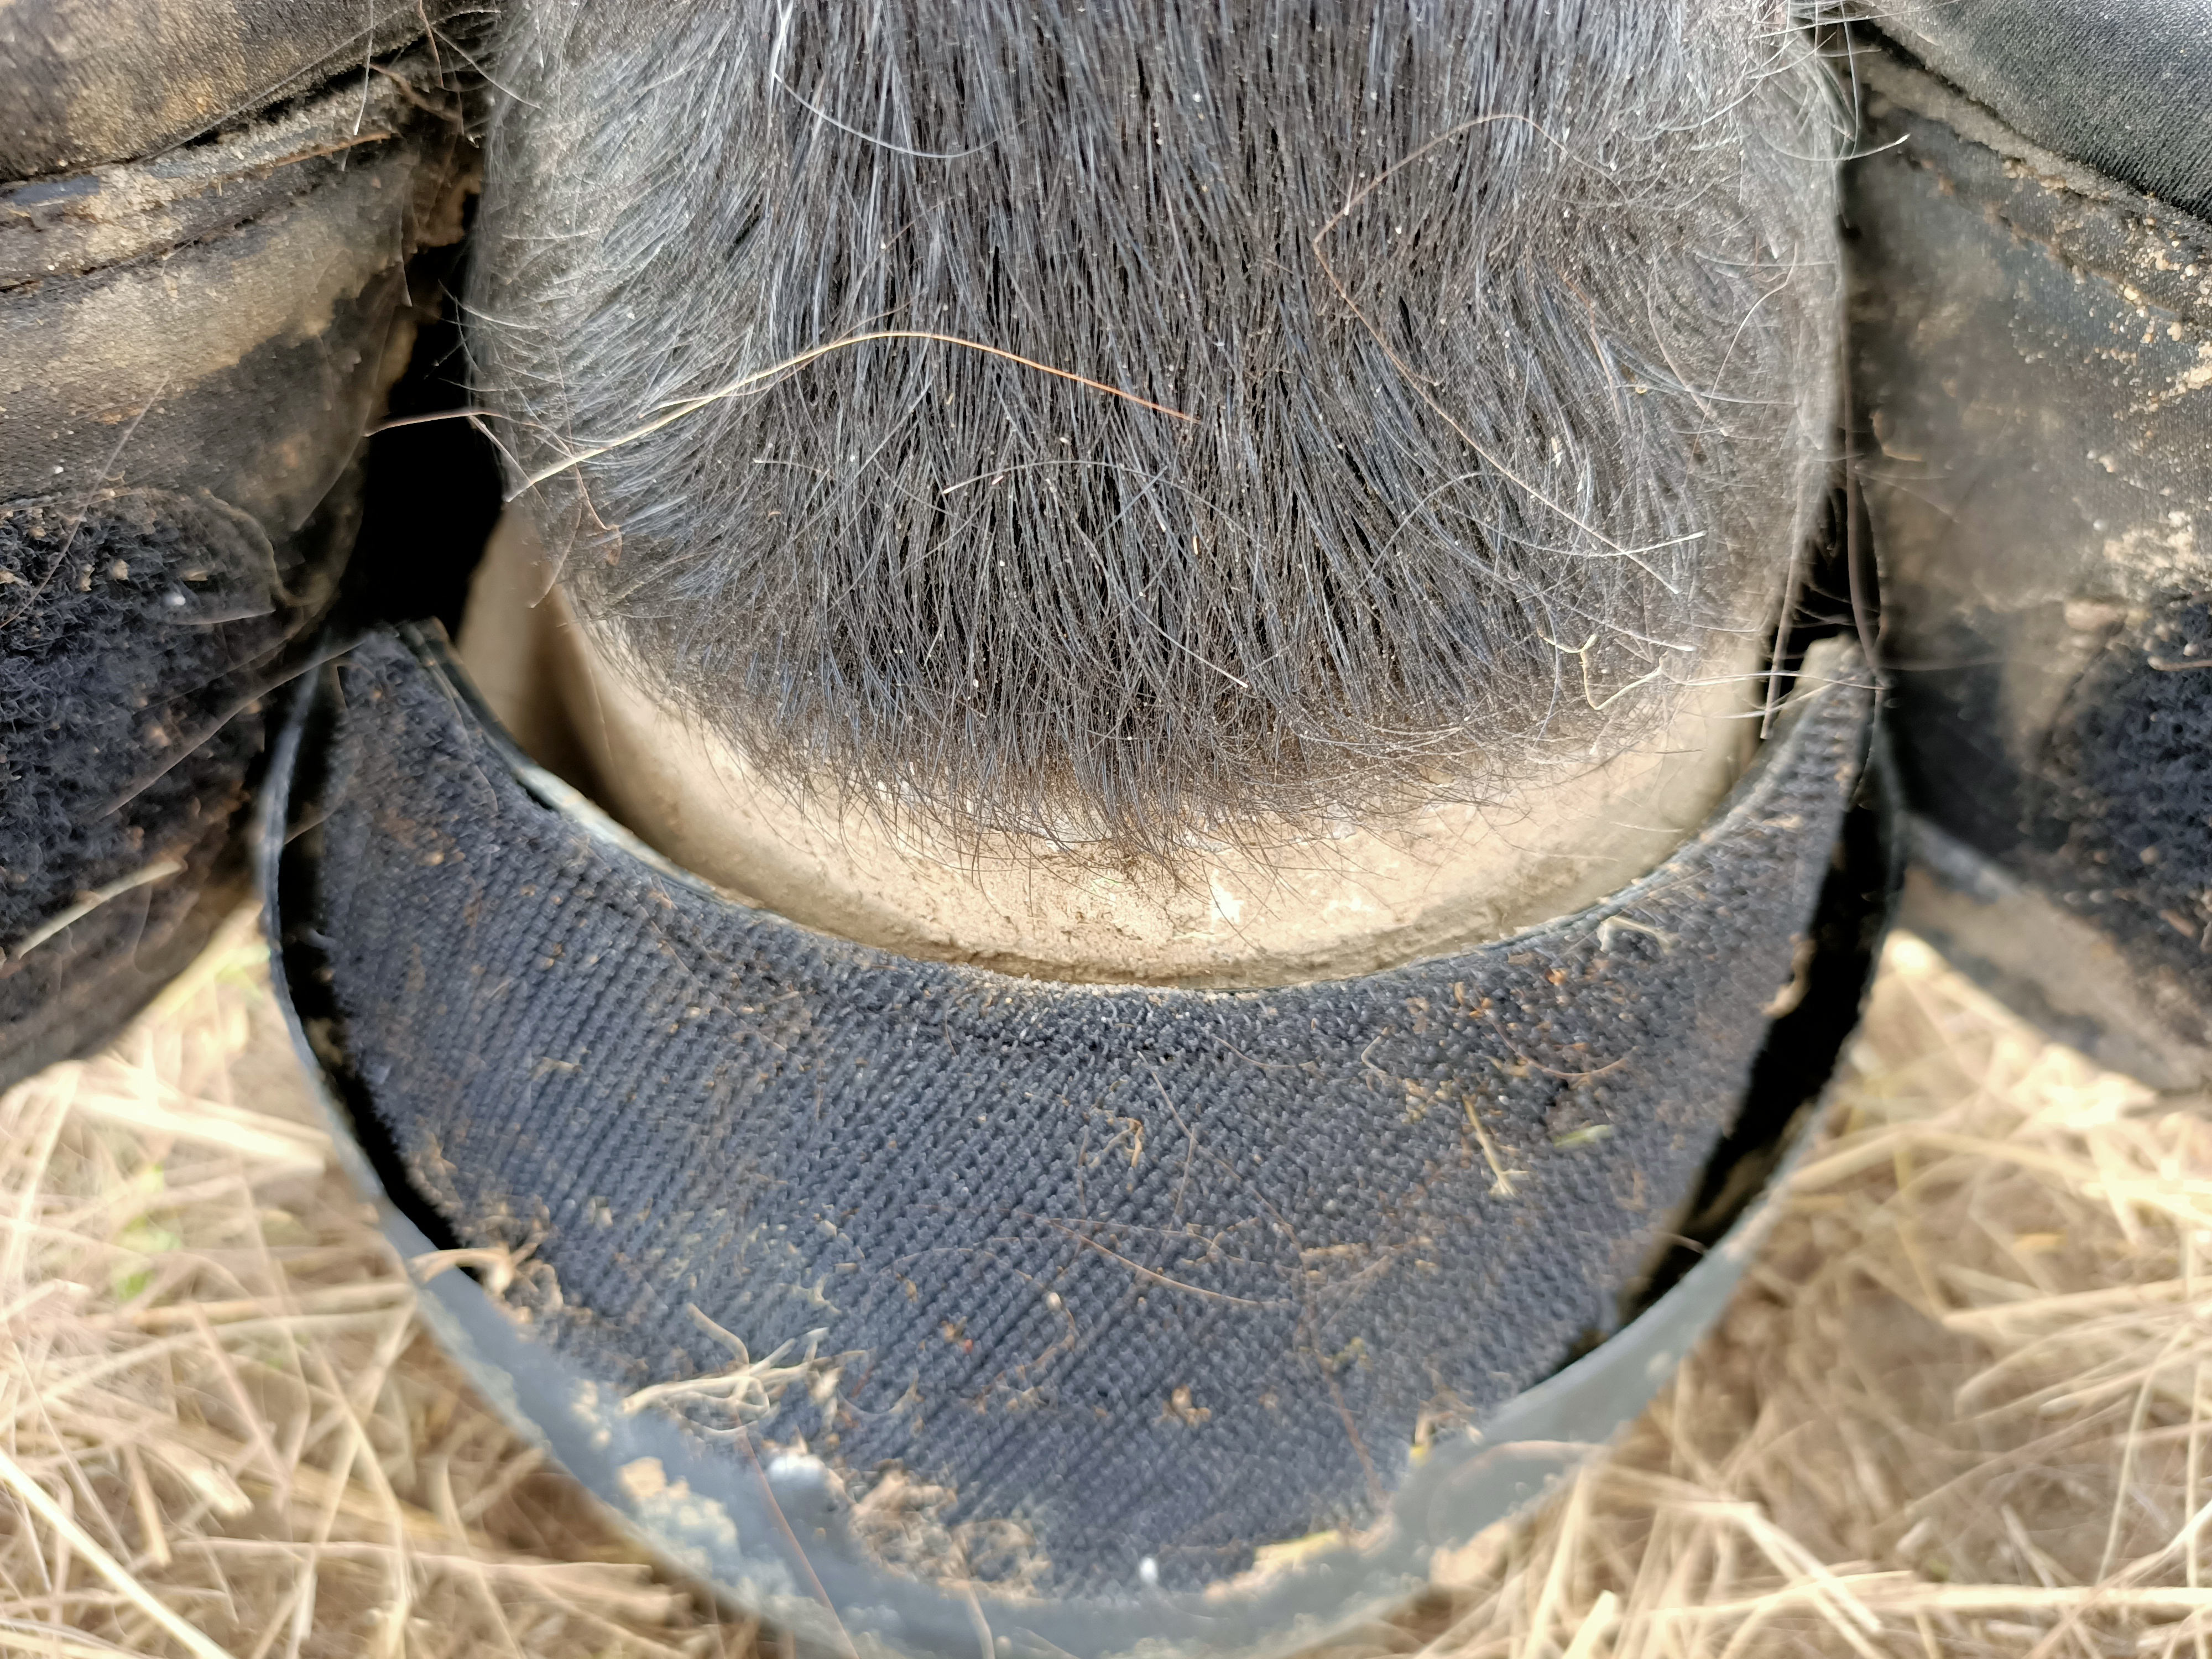
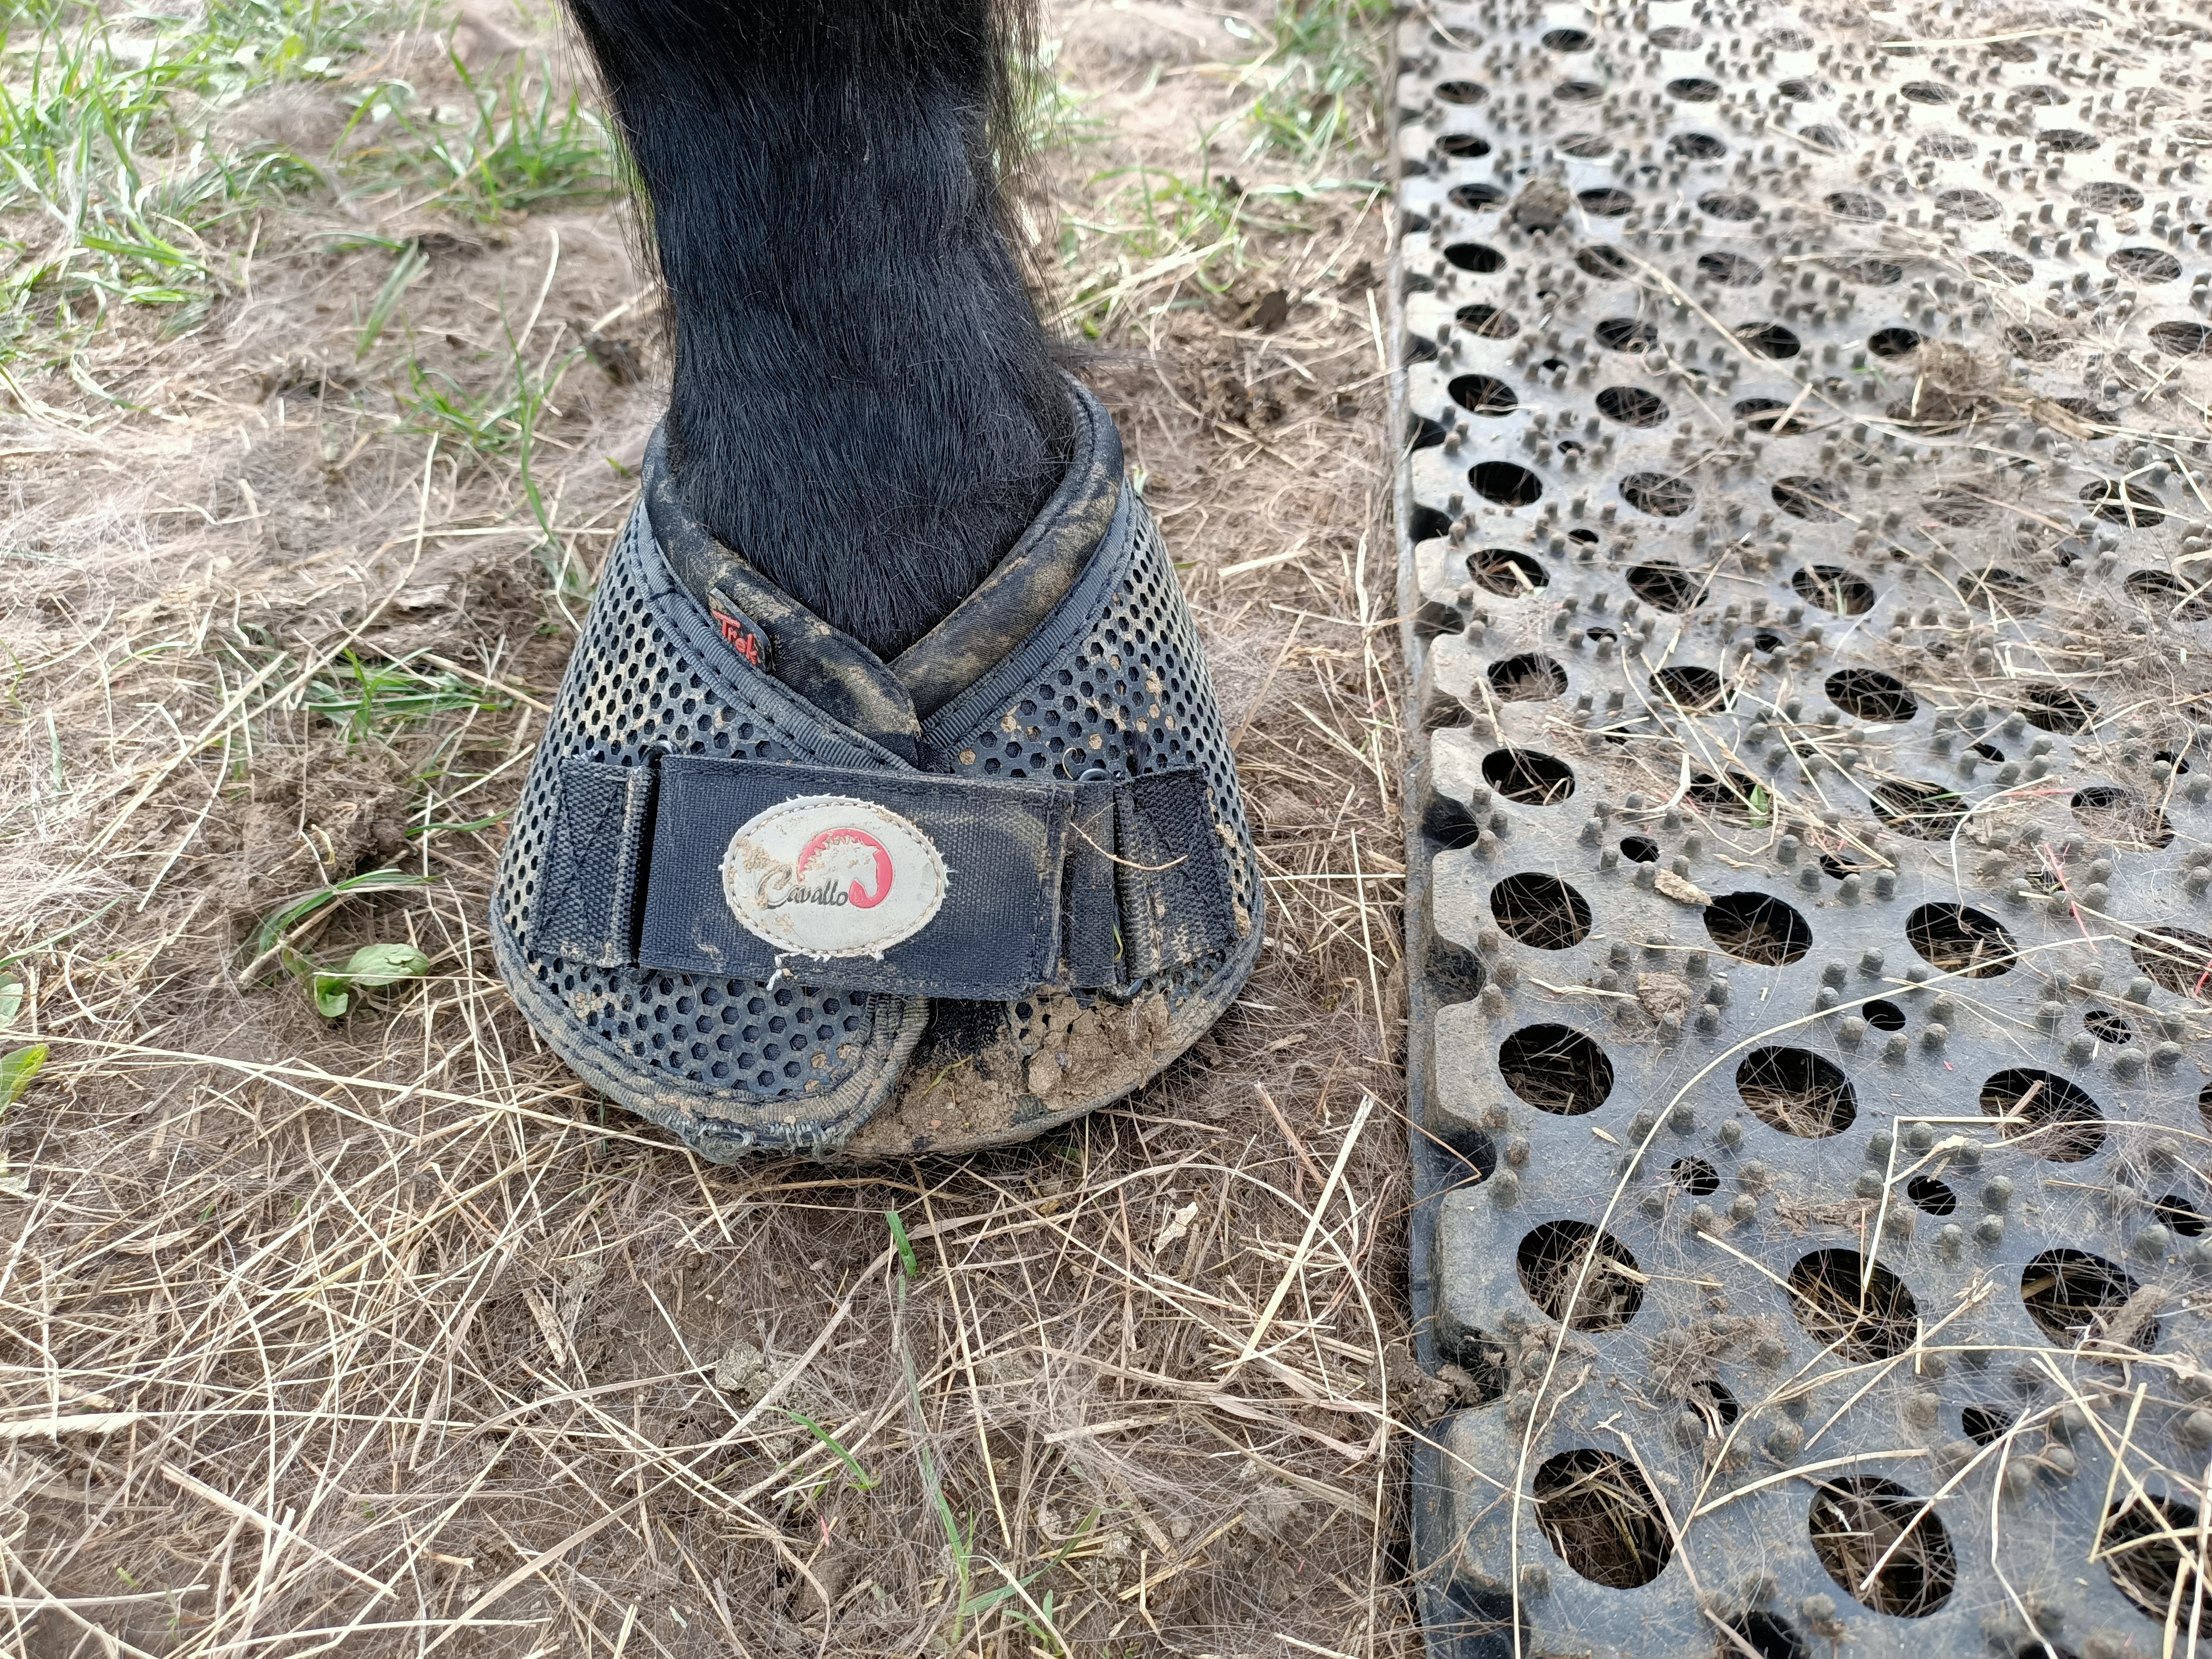
Cavallo photos 6 & 7: The above photos show this same hoof in an actual 2 Regular Cavallo Trek boot.
Note there is a difference between a fit kit shell that gaps because it is just too wide (so the side wall is too far away from the hoof and heels) and a boot that gaps because it is too narrow (but with a wide hoof inside pushing the sides out and distorting the fit). When fitting a Cavallo, the hoof in the latter example may push the side walls of the fit kit out away from the hoof wall BUT when the actual boot is fitted, the upper part of the boot will be a tight fit and will bring the sides walls in, creating a better fit. In the former example, when the boot is too wide in the base shell, the upper part of the boot will bring the sides in a little but not necessarily enough to create a good fit.

Start by placing the Equine Fusion Fit Kit shell under the hoof. Pick up the hoof with the sole facing upwards in the trimming/hoof picking position and slip the toe of the hoof into the toe of the boot and lower the rest of the shell onto the hoof, making sure it is centered. Carefully lower the hoof and shell to the ground, trying to keep the shell straight and in position.
Because of the nature of this boot, the Fit Kit shell will not be a tight fit and the horse will be able to walk out of it easily. The upper part of the boot is what holds the boot in position but using the Fit Kit shell allows you to see exactly how the hoof will sit inside the boot, so it can be a really useful way of judging the best size.
The correct size Fit Kit shell will suit the hoof by sitting closely to the hoof all the way around the width and length.
The length of the hoof must fill the shell completely for the best boot performance. The heel bulbs should be resting neatly against the back of the shell but not sitting on top protruding over the back of the shell. If you visualise a vertical line coming up from the outer edge of the rearmost point of the boot shell, ideally you want the heel bulbs just within this line. With all Equine Fusion models, the boot material is flexible and does have some give, so if the heel bulbs do sit on the back of the boot shell and are very slightly out over the back of the shell the boots can still fit. The All Terrain Ultra model has the most material at the heel bulbs and so can sometimes be the best model to go for if the heel bulbs do protrude out over the back of the shell, but if the size up is too big.
The Trekking model is the most low profile, and has the least boot height, so you do want the bulbs to sit neatly in the shell for this model otherwise the boots won’t fit properly around the heels.
Looking at the boot width, you can have up to a 5mm gap on the sides of the shell and the boots can still work well, but the length must be filling the shell completely.If there is any distance between the back of the horse’s heel bulbs and the back of the shell, it is likely that the shell is too long. The Equine Fusion boots can work well as “therapy” boots if they are a little long, if they are a good fit width ways, but as riding boots they will likely twist, slip or cause tripping if they are too long.
Even if the boot is a little wide either side of the hoof, ideally you want the width to be a close fit either side of the heels.
You don’t want the hoof to be too snug a fit inside the Fit Kit shell otherwise the actual boot may be too small. If the hoof is distorting the shell by standing on the outside edge and squashing it, the shell is too small. If the hoof is squashing the felt/carpet/foam lining around the inside edge of the shell, it is likely it is too small.
If the shell looks a perfect fit around the base of the hoof, there still needs to be room for the boot upper to fit around the hoof and heels. It can help to have some photos of the different Equine Fusion boot models to hand, so you can visualise how the actual boots will attach to the boot shell (having the Hoof Bootique website available on your phone can be helpful when trying Fit Kits).
Flex Boots

- To try on your Flex Boot Fit Kit, pick up the hoof with the sole facing upwards in the trimming/picking out position and slip the toe of the hoof into the boot (you may need to use a slight twisting motion to properly seat the toe into the toe of the boot). Make sure the shell is centered, and place the hoof onto the ground.
- If the hoof size is between two sizes, we recommend choosing a larger size and using a FlexPad. If your horse tends to rotate its feet during the step, we do not recommend a very snug boot as they can rotate on the foot and cannot recover during the step. A slightly looser boot allows the boot to recover during the step.
- The top edge should follow the hoof wall and sit neatly against it without gaps.
- It is important for the horse’s toe to sit right into the toe of the boot. Inside the boot sole there are waves, and then a thicker area near the toe. The horse’s toe MUST sit on this thicker area and not on the waves, otherwise this will affect the performance and wear of the boot and also interfere with the horse’s breakover.
- You must fit the Flex Boots after a fresh, balanced trim. This can make such a difference to the fit and you may need to do regular rasping to maintain the fit.
This photo shows a poor fit. The hoof is too upright for the Flex Boot, meaning the horse’s toe does not sit far forward enough in the shell and there is too much hoof and heel sticking out beyond the boot shell. You need the boot to sit higher on the hoof wall, nearer to the coronet, and to follow the coronet with an even gap between the top of the boot shell and the hairline.

The next 4 photos show nicely fitting Flex Boot shells.
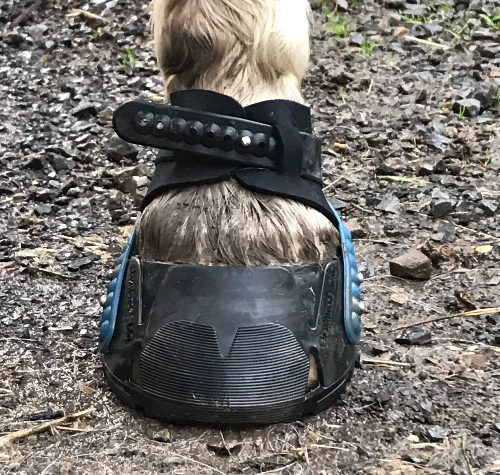
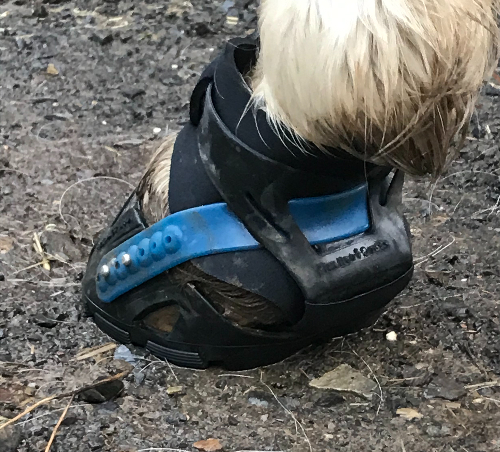
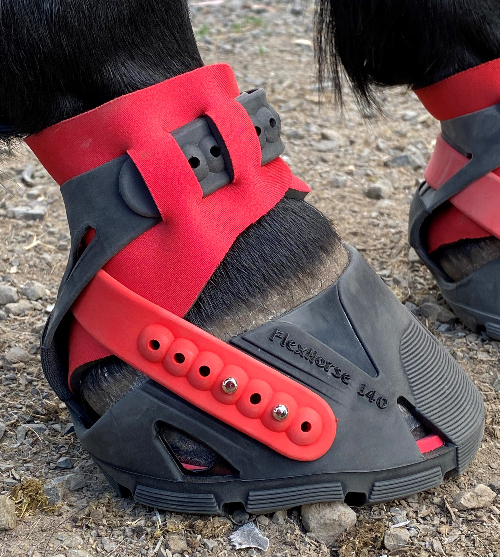
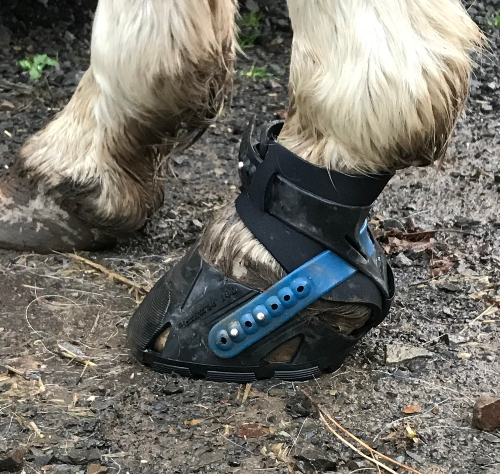
What if the fit of the Flex Boot shell isn’t perfect on your horse?
- If the hoof is very narrow, there can be some space down the sides. Sometimes the top of the boot shell will be a neat fit against the hoof wall but there will be space at the base, either side of the shell. Both of these fits can be OK, as long as the toes are well in. We don't recommend the flex boot for extremely narrow feet as the boot can twist.
- As a therapy boot the Flex Boot can be a great option and the fit can be "off" while the boots serve their purpose and keep the horse comfortable. They may not work so well as a ridden boot, if the fit is “off”.
- Some space at the very back of the boot, and even in the heel quarters is ok, if the toes are in well, and the boot shell hugs the hoof nicely at the front and sides. The flex pads can go in the boots and will spread into the space at the back, and generally make a boot that can be twisted with hand pressure without a pad, to a very tight secure fit, with a pad.
- If the boot shell is gaping at the top - check that the boot has been put on centered, a slightly off centered application will cause the top to gape. Or a horse with a crooked hoof (pigeon toed for example) and a little bit of flare, can cause this to happen. If the flare is grown out then the situation improves. Or the boot may simply be too large. It's best if the boot doesn't gape at the top for boot retention.
- If the fitting shell twists, it doesn't mean that the actual boot will. Once the straps are done up and pads added if necessary, most of these end up a nice snug fit. Again, if the toes go in well and the space is at the back, it's usually not a problem.
These videos are useful when using the Flex Fit Kit shells:
Easycare

- Glove/Back Country
https://www.easycareinc.com/images/Easycare-fitkit-Application-guide.pdf
- Fury
